Install xEquiv in Excel
January 2025
Subject :
This user guide assists you in installing the add-in xEquiv in Excel.
CASE 1: For administrators: give access to xEquiv add-in to users
1.1 Select the Show all option
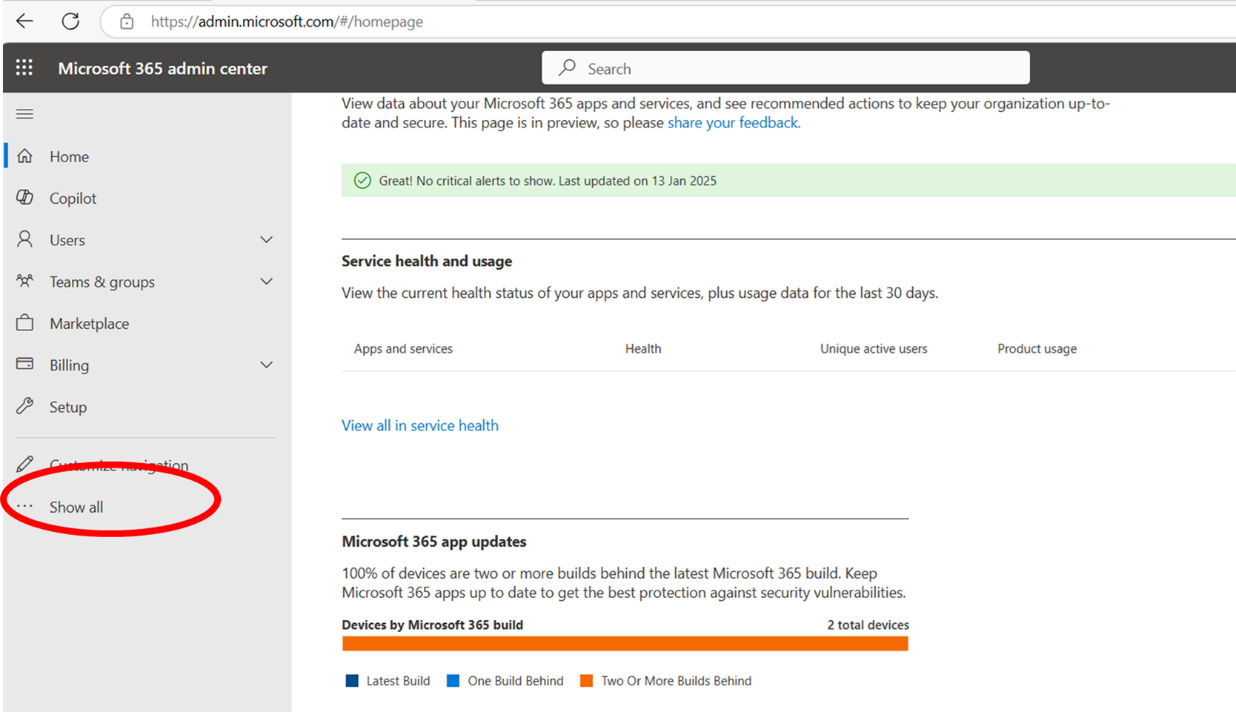

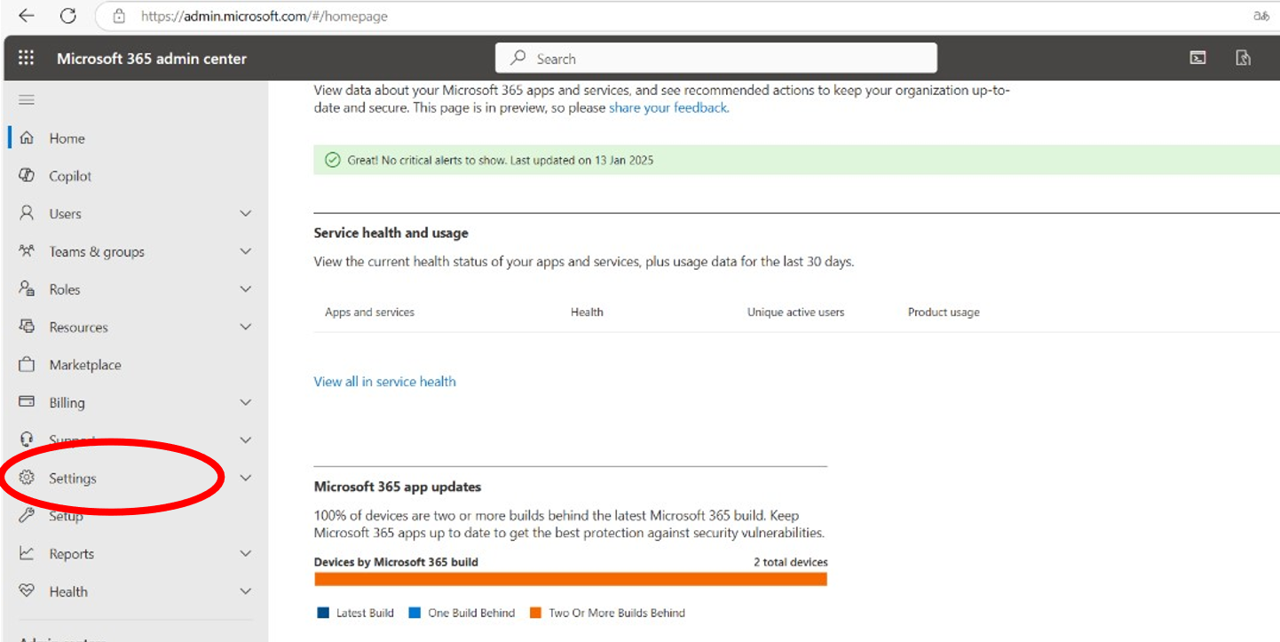
And activate the Settings menu
1.2 Open the Microsoft add’ins store
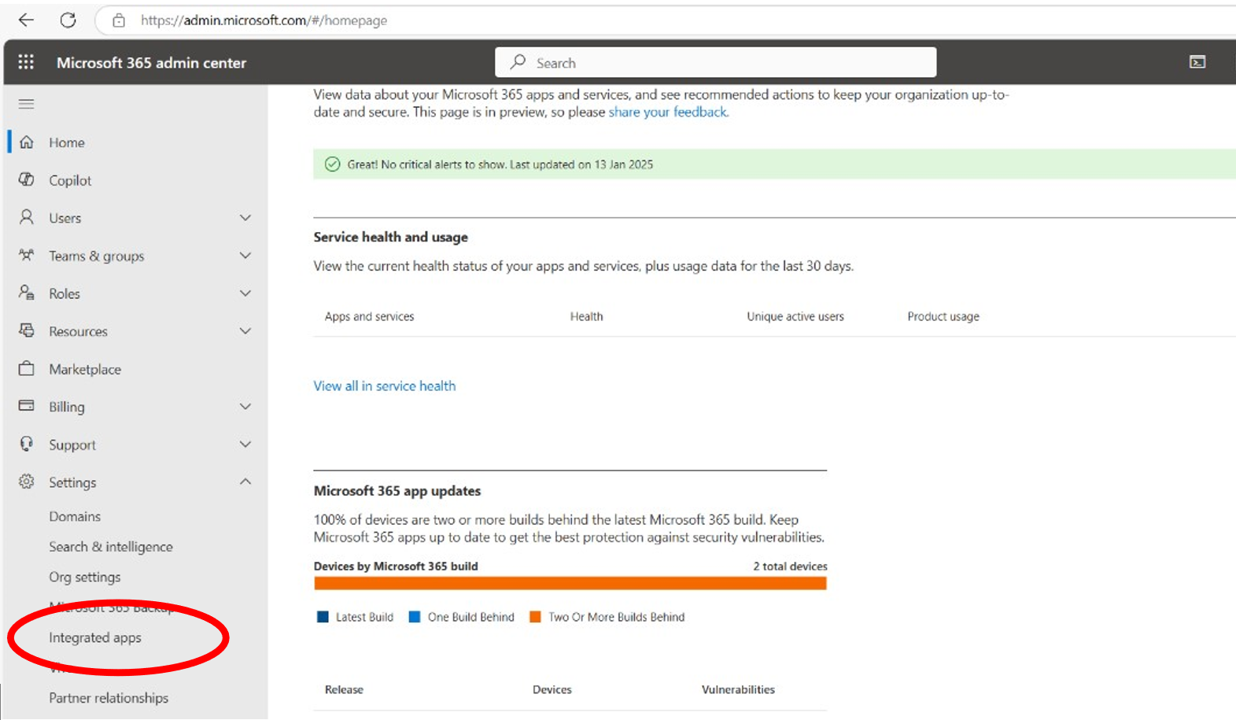
To allow the add’in, select integrated apps to access to the add’in store.
1.3 Find the xEquiv add’in
To find xEquiv, open the search panel in the Microsoft Store
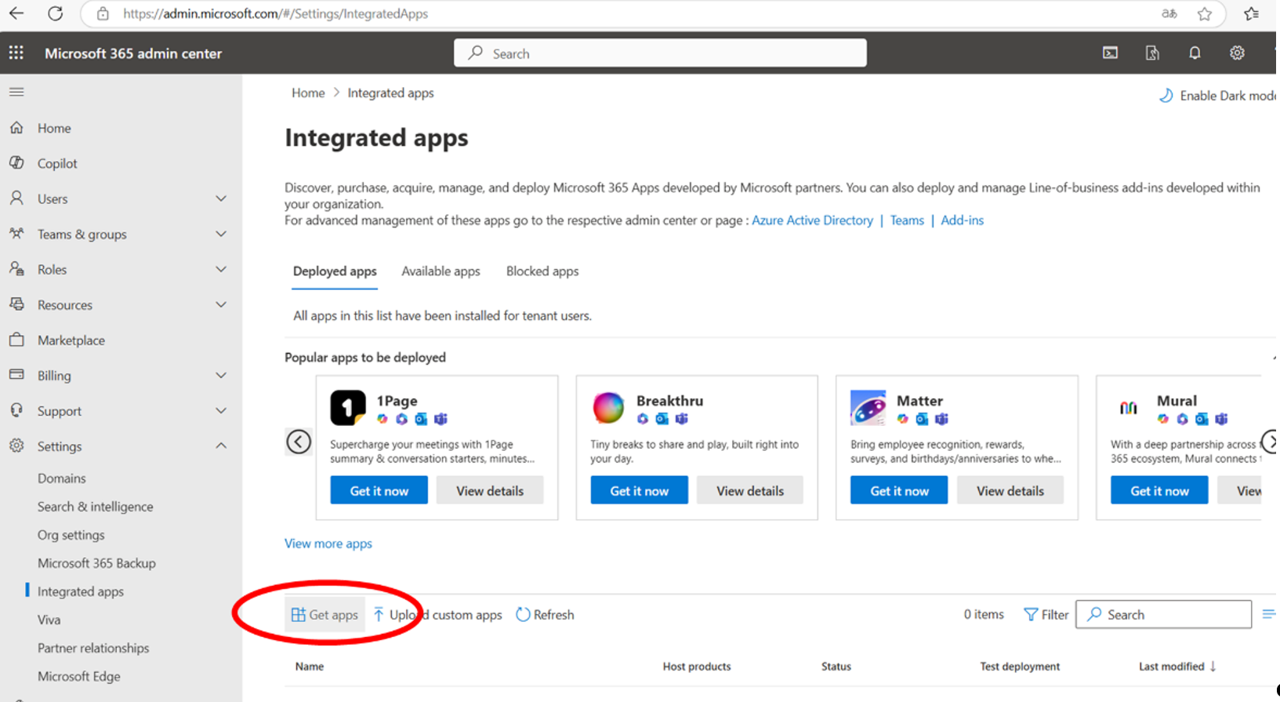
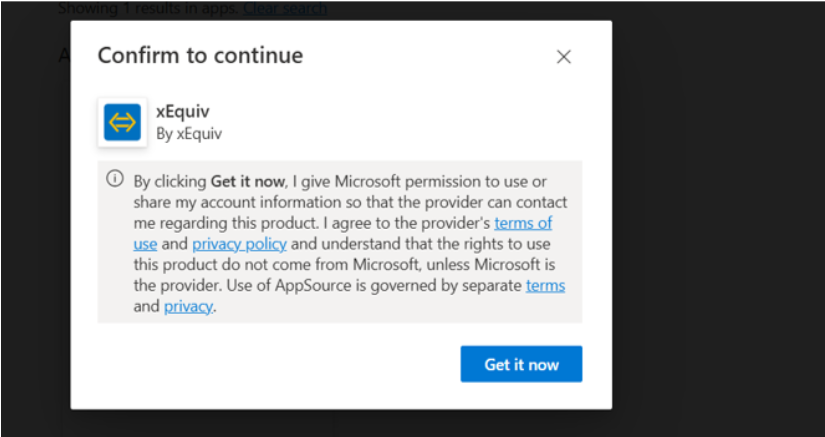
Seach the add’in xEquiv and get it now.

Validate the following panel

1.4 Allow the xEquiv add’in
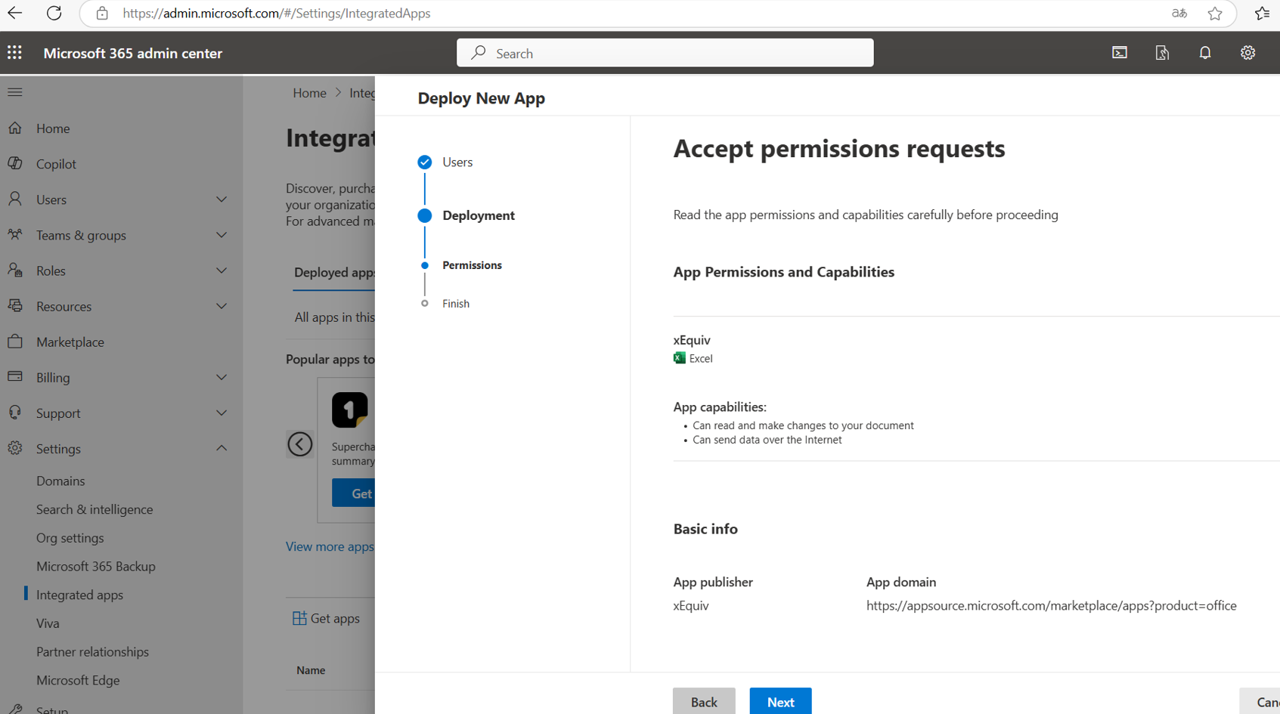
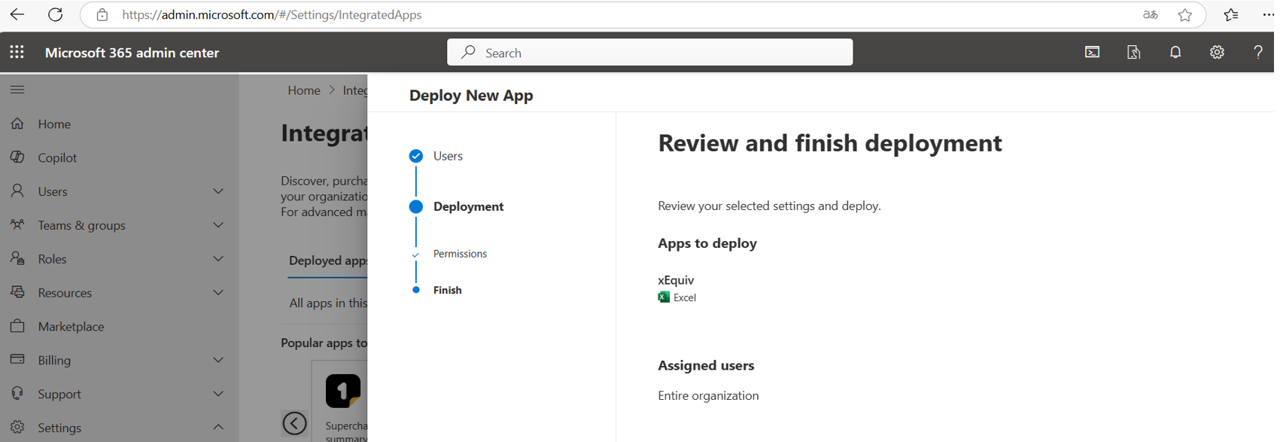
A new panel pops up to make you select users allowed to use xEquiv in Excel,
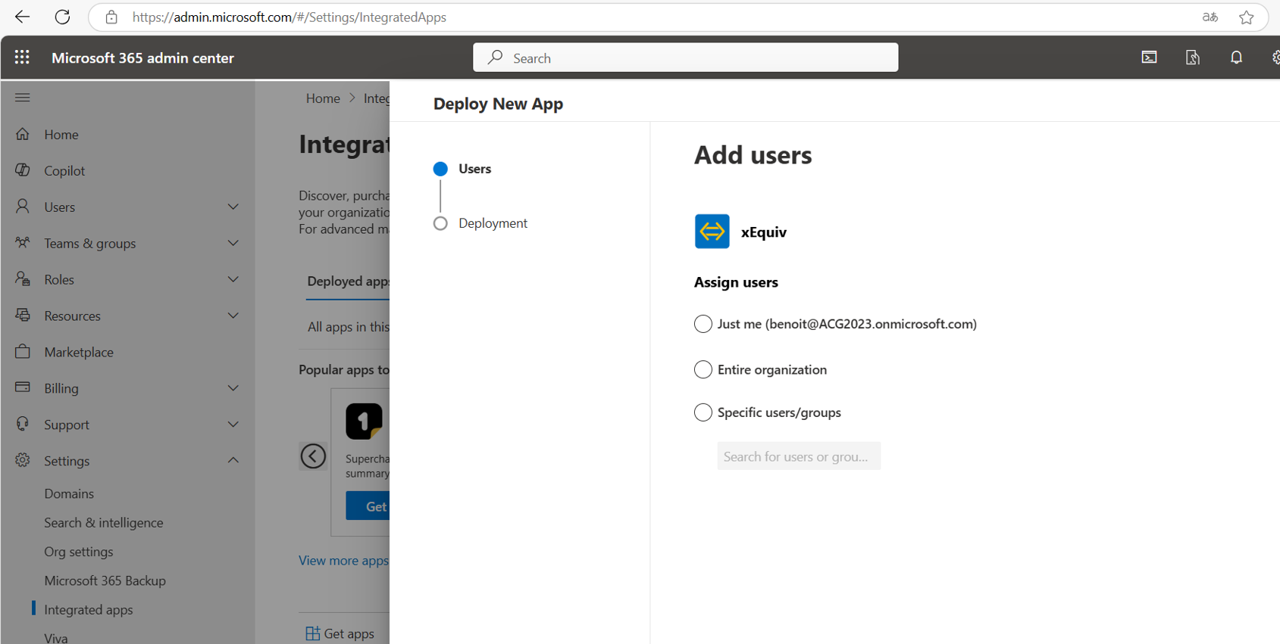
And then follow the authorization workflow
CASE 2: For users: install xEquiv in Excel
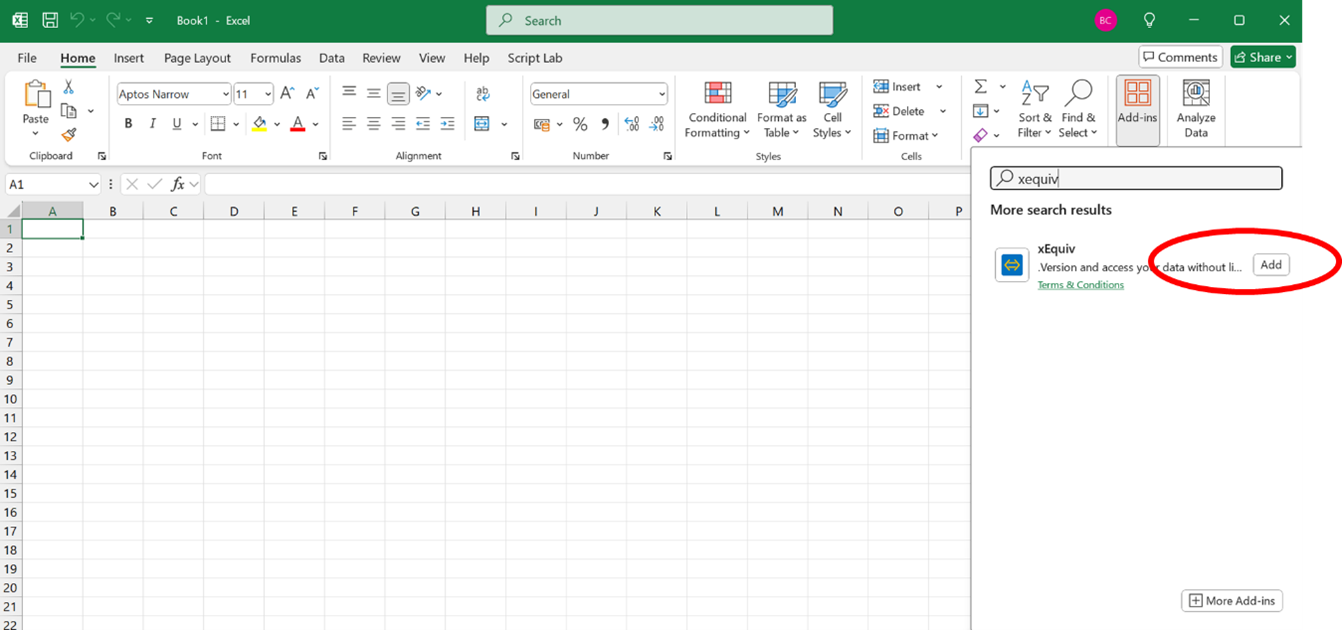
2.1 Search for the xEquiv add-in in the store
Step 1: From your Excel workbook, press the Add-in button in the rubban
Step 2: search for xEquiv

2.2 add xEquiv add-in to the rubban
Just press the Add button in the panel
Congrats, it it is done !
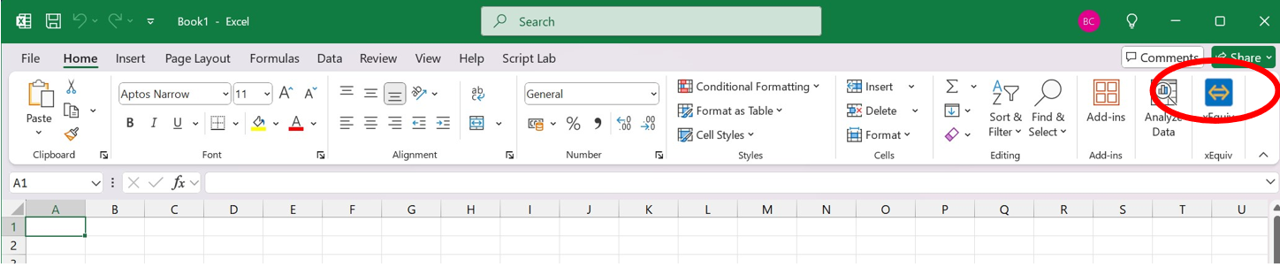
You can now use xEquiv to version and load tables from your workbooks.